I was looking through my copy of the most excellent Ace Cd#4 (disk 2) [plug, plug] when I came across a logo in the collec.gfx/oldies/atari/mic directory that gave me some inspiration.
So I loaded up trusty Deluxe Paint 2 Enhanced v3.0 [my pixelling program of choice] and started work on a logo.
As always, I saved my work in stages, incase I buggered anything up beyond recognition, which incidently serves my purpose now very well.
Later that day, I sent a near-complete version of the logo to my good friend Ravian/Jello [Hi!], who enquired as to how the 'block texturing' was done. I explained, and after some discussion, he suggested I write some kind of tutorial on Deluxe Paint 2 usage.
At first I declined, as I'm certainly not the most accomplished of artists [Hi Made], but after thinking about it, I realized that there are probably a lot of people out there who could do with at least some help in using DP2, and maybe I could write something to do just that.
We decided that it would be very cool to make a home-page that contained some pixelling tips [especially DP2 tips], and thus, the idea for this was born. Of course, it was deemed suitable for GFX Zone, therefore, here it is. So if this document helps you use DP2 and create better graphics for the demoscene, then it has served its purpose.
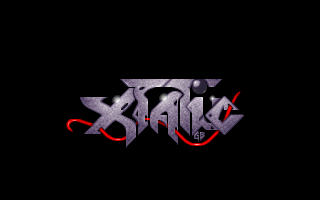
This tutorial will go through the steps used in creating the "old-skool" style logo below.
Disclaimer: I don't claim to be the best pixeller on earth, but maybe this will inspire some of the better artists to make similar documents (?).
 Continue with the guts of the tutorial
See a list of Deluxe Paint 2 shortcut keys
Read the interview with Sky (coming soon)
Copyright (c) 1997 Goblin/Xtatic