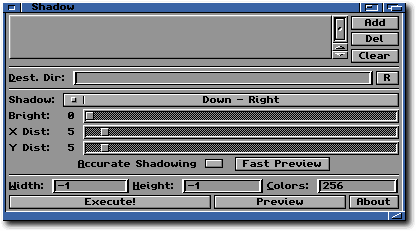
Shadow
This is one of the coolest WebFX effects. I have some people
registered to WebFX just to use this great effect.
Shadow allows you to add shadows to your pictures.
Of course, to obtain a better result, you should prepare your
pictures with great attention and care, following these
notes:
- Shadow effect will use the colour 0 as the background.
Prepare your picture and save it in Color-Mapped format
(ie. not 24 Bit format), so you can have full control of the palette
and set the right color for transparency.
- Shadow effect will map all colour 0 on all the
picture.
Keep this in mind and check that no color 0 is inside the
picture where you don't want it. For example, suppose you set the
color 0 to bright white (R: 255, G:255, B:255) and your picture
has another with around, please Double Check your pictures
before applying this effect.
- Shadow effect creates white backgrounds.
At the moment, Shadow effect will generate shadows on white
backgrounds only. I am working on a better solution, but it is not
a priority on my works.
- Shadow effect is slow.
It is better to test pics with the Preview gadget before converting
them with the Shadow effect to save time.
Let's have a look to Shadow interface:

- First of all, you have to Drag & Drop the
pictures inside the ListView at the top of the Window. If you don't like Drag
& Drop you can always use the Add gadget which will open an usual File
Requester.
- Then you have to specify the Destination Directory where the new
pictures will be saved. The new pics will have the same name of the
original file, with the appropriate extension added in the tail.
WARNING: no overwrite check is done before saving!
As usual, you can always Drag & Drop an existing directory or device, which
will be used as destination dir.
- Using the Shadow cycle gadget you can set the direction that
the shadow will take.
- Use the Sliders to set shadow brightness and distance from the
original picture. Usually, set X and Y inside a range between 5 and 10 for
optimal results.
- As usual, set the final Width and Height and Depth of the final
pictures and press Execute!.
Do you want an example of the Shadow effect?
Well, every picture in these documents has been shadowed using the
Shadow effect :-).

